Posts filed under Fountain Pen Maintenance

Zen and the Art of Fountain Pen Maintenance

(Susan M. Pigott is a fountain pen collector, pen and paperholic, photographer, and professor. You can find more from Susan on her blog Scribalishess.)

Some fountain pen owners are fastidious about cleaning their fountain pens. They keep an ongoing record of which pens are inked, the date of inking, the color, when the pen needs to be cleaned, and the date the pen moved out of rotation. They typically have only a small number of pens inked at any given time. Then, each week or so, on an appointed day, they clean out their inked pens, dry them carefully, and choose a new set of pens to ink and use.

I am not one of those people.

I just spent an entire morning cleaning my fountain pen collection of about 70 pens. A few of these pens had been properly cleaned and stored, but, I am sad to say, most had been left with ink, unused, for months. I am a very naughty fountain pen owner. Honestly, it's not that I neglect my pens. I really do love them–all of them. I simply want to be able to use any given pen at a moment's notice as the mood calls for it. Plus, I'm disorganized and clutter-muddled and I can't keep track of which pens are inked and which are not. Thus, the Mega Pen Cleaning Morning involved the following sets of pens (I didn't take a photo of the first batch, so, really, there were five batches in all).

Now that all my pens are clean, I hope to do a better job of keeping track of them. To be sure, I have plenty of empty notebooks to do this. Special notebooks also exist for this purpose, such as the InkJournal and Pen Habit's "Currently Inked" log.

All of this made me think about the art of fountain pen maintenance, in particular cleaning.

Equipment

You really don't need much in terms of equipment to clean fountain pens. Here's what I use:

  • Water. I do all my cleaning at the kitchen sink using tap water. But some people prefer to use distilled water to avoid hard water deposits affecting their pens.
  • Pen flush. You can purchase commercial flush such as Goulet's Pen Flush $11.00, or you can make your own. Basically Pen Flush is 1 part ammonia to 10 parts water and a couple of drops of Dawn Dish Detergent. If you use pen flush, draw it into the pen or converter, soak, and then rinse with plain water repeatedly to insure all the cleaning solution is gone.
  • Bulb Syringe. You can get one of these in the baby aisle of any supermarket. This is useful for cleaning out nib units.
  • Q-Tips. I use these only to wipe out and dry caps after I've rinsed them. I don't recommend using them on any other parts of your pens since fibers can get lodged in fountain pen barrels or nibs.
  • Towel. I just use paper towels, but you can use a dedicated soft towel for wiping down your pens. Paper towels are fine for letting your pens dry and wiping off nibs.
  • 100% Pure Silicone Grease. If you have a sticky piston or converter, silicone grease is the answer. You can buy this from Goulet $3.00 or, if you've purchased a TWSBI, you get a vial of it with the pen.
  • Toothpicks. I use these for dabbing silicone grease where it needs to go.

Methods

The way you clean a fountain pen depends on the type of pen you're working with. Some fountain pens are easier to clean than others. I will discuss the various methods I use with the fountain pens I own. I no longer own any vintage pens with sacs or complicated filling systems, so I will leave that for others to discuss.

Eyedropper Fountain Pens

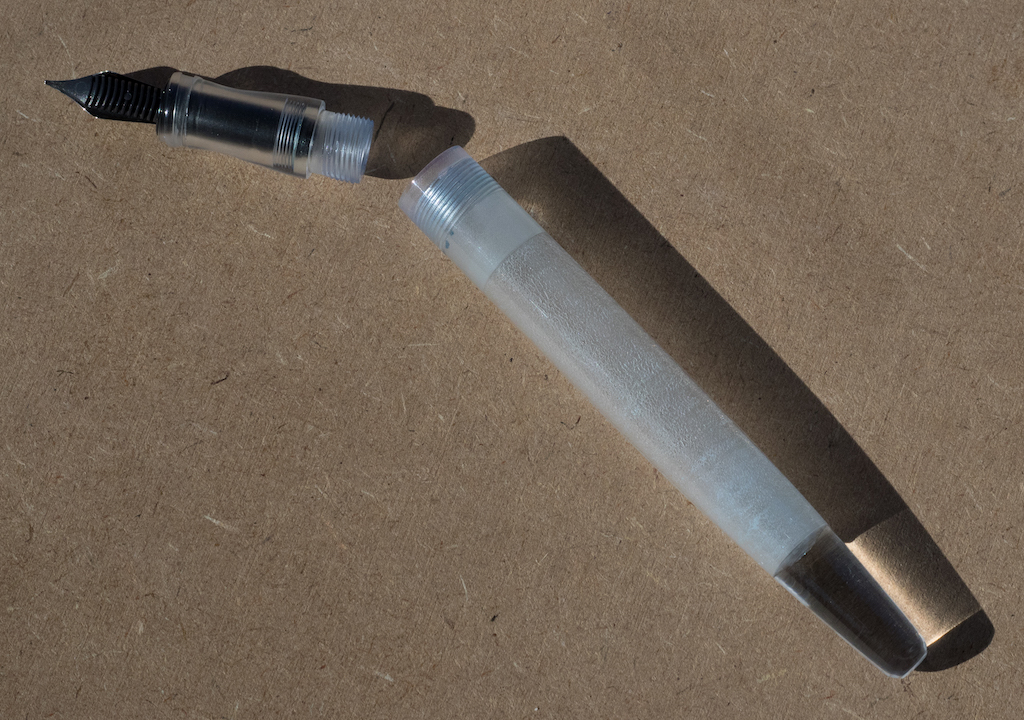
This is probably the easiest kind of fountain pen to clean. Just unscrew the nib, empty the ink, and rinse the barrel thoroughly. Put the nib unit under running, room-temperature tap water to rinse out the bulk of the ink. Then use the bulb syringe to gently finish cleansing the nib unit.

Squeeze gently (too much force and you might pop the nib off the feed. I've managed to do that). Repeat until the water is clear.

Cartridge/Converter Fountain Pens

The next easiest kind of pen to clean is cartridge/converter fountain pens. Empty the ink and separate the nib from the converter. Put the nib unit directly underneath running tap water to rinse out most of the ink, then finish with the bulb syringe.

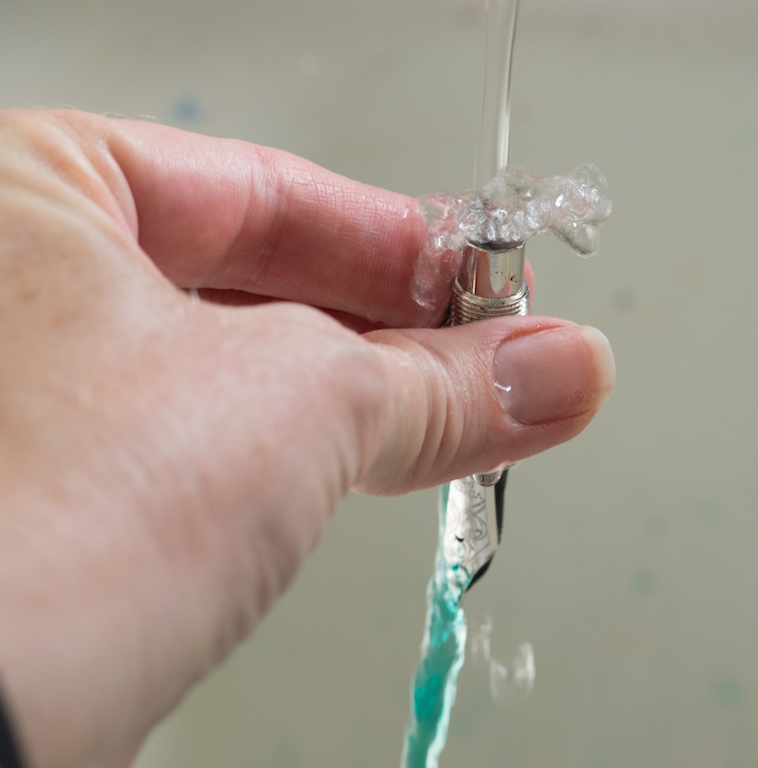
The converter can be rinsed separately. Reassemble and you're done.

Piston Fountain Pens

Piston fountain pens are simple to operate, but getting all the ink out can be a chore. Turn the piston to empty out any remaining ink. Fill a bowl with water and insert the nib unit. Fill and empty until the water runs clear or your patience runs out. I flick the pen to empty out any remaining water, but be careful to hold onto your pen and watch where you flick–you don't want to mangle your nib on the side of the kitchen sink.

Vacuum Filler Fountain Pens

One of the most difficult kinds of pens to clean are Vacuum-filler fountain pens. It just seems that getting all the ink out requires an awful lot of plunging, but unless you can disassemble the pen (as you can with a Conid Bulkfiller), you simply have to rinse and repeat. Empty the ink out, pull out the plunger, put the nib unit in clean water, and plunge. I gently shake the pen to help remove the ink from the barrel walls. Empty and repeat until the water is as clear as you can get it.

Caps

Occasionally, ink leaks into pen caps, so I usually rinse out my caps when I'm cleaning my pens. Afterwards, I use a Q-Tip to wipe out any remaining ink and dry the pen cap. I leave the cap upright on a paper towel to complete the drying process.

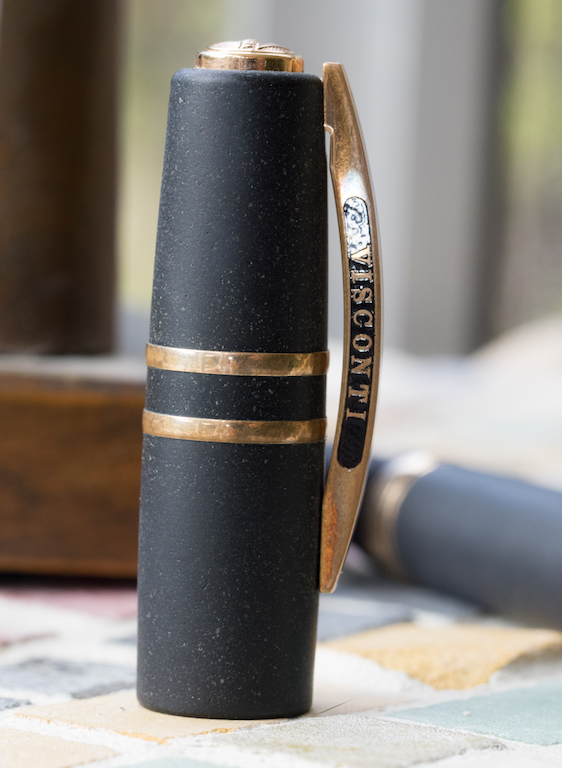
Dealing with Sticky Pistons/Converters

Sometimes pistons get sticky and are difficult to move. If the fountain pen has a removable nib (as Pelikans do), the problem is easily remedied. Simply retract the piston, remove the nib unit, put a bit of silicone grease on a toothpick, and gently rub the grease onto the walls of the barrel as close to the piston seal as possible. You don't need much. Move the piston in and out to lubricate the pen and reinsert the nib unit.

Some converters (such as Platinum and Sailor) can also be disassembled and lubricated. I have to do this quite often with Platinum converters which get gummed up easily. Unscrew the gold/silver portion (getting it started can sometimes be difficult. Use rubber gloves if you need to get a better grip).

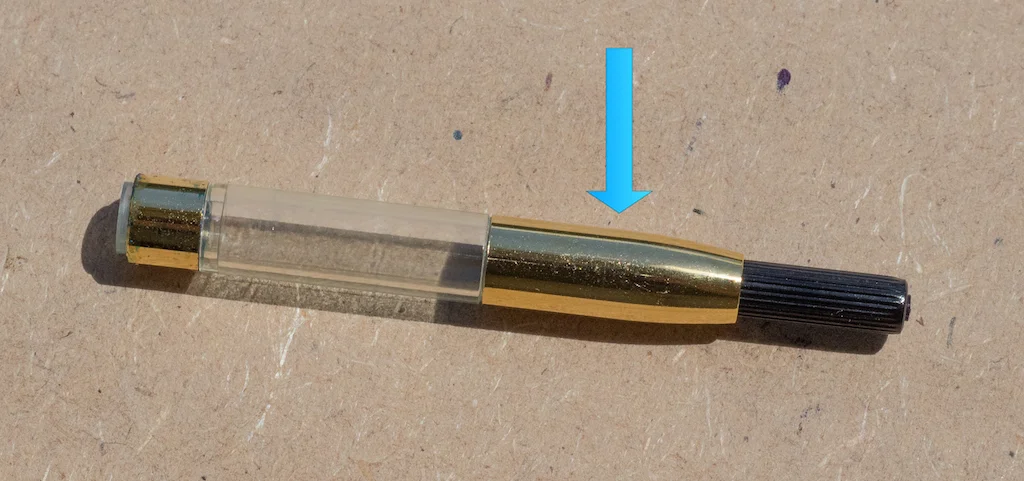
Pull out the piston assembly carefully. On Platinum converters, there's a tiny gasket that comes off and can easily be lost, so do this at a table or counter.

Dry off the end and smear a small amount of silicone grease on the portion that touches the converter sides. Reassemble and move the piston in and out until it works smoothly.

Obviously, there's a lot more to fountain pen maintenance than cleaning and lubricating pistons/converters. But this article provides a starting point.

How often you clean your pens is really up to you. You may decide on a rotation system as I described in the introduction. Or you may use your pens until the ink runs dry and clean them before refilling. Most modern fountain pen inks won't harm your fountain pens (but use extra caution with vintage pens). If you use highly saturated inks and/or iron gall inks, clean your pens more often.

Cleaning your fountain pens really can be an enjoyable, zen-like task. There's something quite satisfying about emptying a pen, flushing it clean, and readying it for a new color of ink.

Just don't wait to do your entire collection on one day.


Enjoy reading The Pen Addict? Then consider becoming a member to receive additional weekly content, giveaways, and discounts in The Pen Addict shop. Plus, you support me and the site directly, which I am very grateful for.

Membership starts at just $5/month, with a discounted annual option available. To find out more about membership click here and join us!

Posted on July 1, 2016 and filed under Fountain Pen Maintenance.

Smooth As A Baby's Bottom – Or Not

Disclaimer: In this article, we discuss methods for altering fountain pen nibs. Alter your own pens at your own risk. Please be careful, but if something goes wrong, don't blame us!

Explanation of the problem

The Kaweco AL Sport is one of the fountain pens that I coveted since the first time I browsed through the fountain pens section on JetPens. It was sleek, simple, and aluminum. Other people who reviewed them said such great things about them. I knew that I would buy one at some point.

I ended up buying one at the end of the year and was blown away by the build quality of the pen. After inking it up and trying to write with it, I became frustrated. The ink just wasn't coming out consistently. I chalked it up to the fact that it was new and maybe the ink needed a little time to saturate the feed. A few hours later, same problem. Well that's weird.

Several days later, I emailed JetPens to see what I could do about the problem. They suggested giving the pen a thorough cleaning. Sometimes there is a chemical residue on the nib from the factory that can cause skipping and hard start issues. Perfect! After a thorough cleaning and a 24-hour soak, I inked the pen up again and tried writing with it. (I'll also note that they were extremely willing to send a replacement nib if I still had trouble. Thanks, JetPens!)

Again, a terribly frustrating experience. It would never write on the first stroke, and was incredibly inconsistent once it started writing. It felt like writing with a pen that only had a drop of ink left. Downstrokes were usually dry or non-existant, and other strokes were less sporatic but still skippy. I was discombobulated.

writing sample.jpg

My first hunch was that there was a problem with the feed. After a lot of searching online and no real results, I gave up and ordered a new nib unit from JetPens. I thought the nib that came with the pen was obviously a dud and I was tired of trying to figure out the problem. I thought it was too much to ask that a pen that cost $76 needed so much troubleshooting to make it write.

The new nib came in, and I installed it in the pen and started to write.

I started seeing red when I realized I was having the exact same problem as the other nib. OK, that's it. I came close to using the AL Sport as a ninja throwing star on my poor office wall.

After I cooled off, I started doing more research on the pen. It was disheartening to find so many glowing reviews of the Kawecos. The negative points I found described the pen as not writing at all, and Kaweco or the seller quickly resolved the issue with a new nib that wrote perfectly.

For a while, I wrote the Kaweco brand off entirely. Never again will I buy one of their pens!

So, baby's bottoms are bad?

Eventually, I stumbled on this article by Evan Brus on his AL Sport. Finally, after so much searching, I found someone with the exact same issue. Plus, he put a name on the issue. Baby's bottom.

Basically, baby's bottom is a problem with the nib in which the tines come together and form a small inverse pool instead of a flat surface where the nib meets the paper. Since the part of the nib that delivers the ink isn't really touching the paper, the result is bad starts and inconsistent ink flow.

babies bottom.jpg

Image above via Richard Binder's nib smoothing guide

Now that I knew the name of the problem, I found an abundance of tips and advice on how to fix the issue. Perfect.

I'd watched this video a couple of times about how to smooth a nib, but it doesn't cover baby's bottom. It's still an excellent video and very instructional for making scratchy pens smooth.

After a quick search, I landed on this tutorial by Stephen Brown on how to get rid of baby's bottom on a nib. Absolutely fantastic. The video is about 14 minutes long, in which Stephen demonstrates the technique on a Mont Blanc.

As always, it's extremely important to note that working on your pen is something you choose to do completely at your own risk. Any damage or voiding of warranties is entirely your fault. If you don't want to risk it, send your pen to a professional.

The tools

So, what do you need in order to smooth out that baby's bottom? A few things.

First, you need micro-mesh pads. These are similar to sandpaper, but they're soft and attached to foam. This makes it more difficult to cause too much grinding. Anderson Pens sells a great package of 9 different pads for smoothing and polishing. This is a great package because you need these varying levels of grit in order to properly correct the nib.

I used a nail file that I found at the local store. It has four sides of varying grit and is foam-backed on all sides. It's not the best, but it works well. I plan on purchasing a pack of pads from Anderson Pens with my next order.

Next, you need a small amount of water. I kept mine in a syringe.

It's also handy to have a rag nearby to clean up the water and ink from the pads.

And, finally, you need a pen that is troubled by the terrible baby's bottom syndrome. The pen needs to be inked. Otherwise, you won't be able to test the nib and ink flow after each smoothing cycle.

tools.jpg

The technique

Before you start grinding your nib, please be sure to check that the nib tines are properly aligned. This video is an excellent resource that you should definitely watch. If the tines are misaligned when you start grinding, your problem won't get better.

The technique is fairly simple. You start with the coarse grit pad first, and then work down to the finest grit. You perform the exact same actions on each pad. The idea is that the coarse pads grind the nib down very slightly in order to remove the baby's bottom, and as you move to the finer grit pads, the nib becomes smooth and polished for a glassy writing feel.

greengrit.jpg
  • First, start with the coarsest pad you have. Place a drop or two of water on the pad. The water helps lubricate the nib.
  • Next, place the nib in the water drop and starting drawing figure-eights. Complete no more than 8 figure-eights. Use a light pressure, similar to when you write.
  • Next, draw 8 infinity signs on the pad. Again, use a normal pressure.
  • Next, blot up the water and ink with a rag or towel, and move to the next pad. The next pad is the one that is one step below the most coarse grit.
  • Repeat the steps. A drop or two of water on the pad, draw 8 figure-eights and 8 infinity signs, blot, and move to the next finer grit pad.
pinkgrit.jpg

Keep doing this until you complete the process with the finest pad you have. After that, try writing with the pen. Is it smooth and perfect? You're done! Is it still having problems with ink flow? Repeat the process. Keep smoothing until the pen is writing correctly. Don't go overboard. Remember to only draw 8 signs each on each pad. If you grind too much, your pen will develop a different problem that you can't fix.

With my Kaweco, I went through the process 5 or 6 times. After that, it writes like a dream.

Happy writing

I'm happy to say that my Kaweco AL Sport is now one of my favorite pens. I've also tuned up a couple of my other pens that have slight nib smoothness issues. This is a great skill to practice and hone since it seems like a lot of nibs these days aren't quite perfect from the factory.

If you want to try this out, I'd recommend practicing on a cheap pen. With the Kaweco, a spare nib unit costs about $11 from JetPens. The pressure isn't too high in that case. However, when my Lamy 2000 had some slight issues, I let Mike Masuyama fix it. I don't want to ruin a premium fountain pen with an irreplaceable gold nib. Let the experts handle that one! There are plenty of nibmeisters out there who can make that nib sing.

I'd be curious to know if you've had any problems with nibs. Have you tried fixing them or had someone else fix them?

(You can find more from Jeff online at Draft Evolution, Twitter, and App.net.)

Posted on April 23, 2014 and filed under Fountain Pen Maintenance.