(Kimberly (she/her) took the express train down the fountain pen/stationery rabbit hole and doesn't want to be rescued. She can be found on Instagram @allthehobbies because there really are many, many hobbies!.)
(Don’t worry, there won’t be any spoilers until way further down, so if you haven’t busted out Day 1 of the Diamine Inkvent 2021 Calendar yet, you can read most of this article without seeing the swatches, though good luck avoiding the spoilers on Instagram!)
I wanted to give a quick overview of how I swatch my inks which will also be a part of my future ink reviews (so many things to review, so little time!). Everyone does this differently so do whatever works for you! I love seeing the variety that is out there but I also know how (1) not remotely artsy I am and (2) extremely lazy I am.
As mentioned in the gratitude article, one of the things I love and use A LOT are the Col-O-Ring Ink Testing Books from The Well-Appointed Desk. The rings make it easy to sort, flip through, and they are very portable too. After swatching a couple dozen inks when I first got my samples, I quickly realized I wanted two sets so I could sort by brand and by color. For example, I may want to find out what color “Cult Pens Robert” is without flipping through the colors to guess what color it might be. Or I may also want to see what colors match my pen (we all know this is one of my favorite parts of this hobby). Having two sets makes it easy to do both.
A while back, one of my packages had a leaky bottle which leaked over an Endless Recorder notebook with 68 gsm Tomoe River paper. Shout out to Pen Chalet for replacing the notebook, but what was I going to do with a notebook that had an inky cover? Why not use it as an ink journal of sorts? So that’s what I set out to do. And while I was at it, why not also use some 52 gsm Tomoe River notebook inserts from Curnow Bookbinding too? And as of a few days ago, why not add the Cosmo Air Light (CAL) 75 gsm notebook insert to the mix? Anyway, you can see how quickly this can escalate if you’re not careful, lol.
Here’s my setup for doing the swatches.
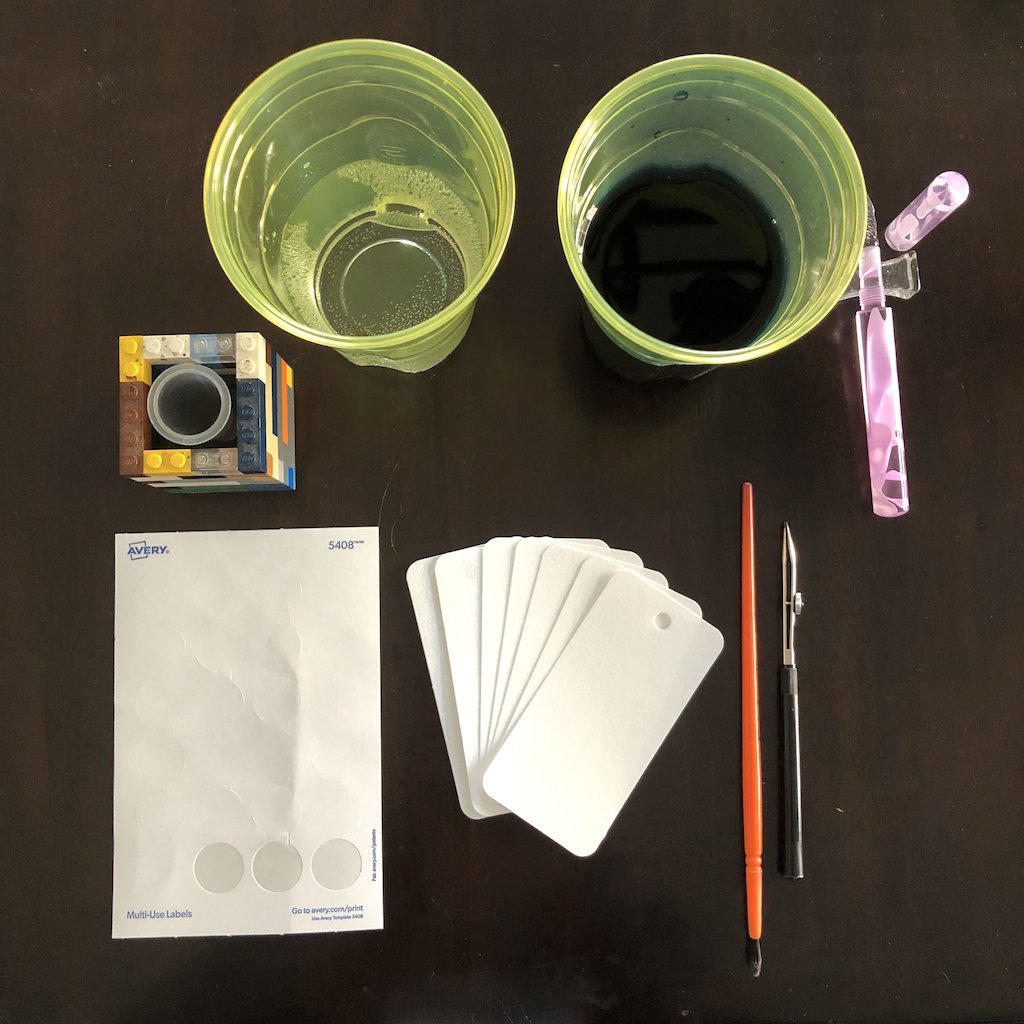
I have my trusty LEGO Ink Miser holder, (for holding sample vials), Col-O-Ring cards, glass dip pen, pen rest, paintbrush, ruling pen, cups, syringe, Avery circle labels, notebooks and paper towel/ink rag (not pictured).
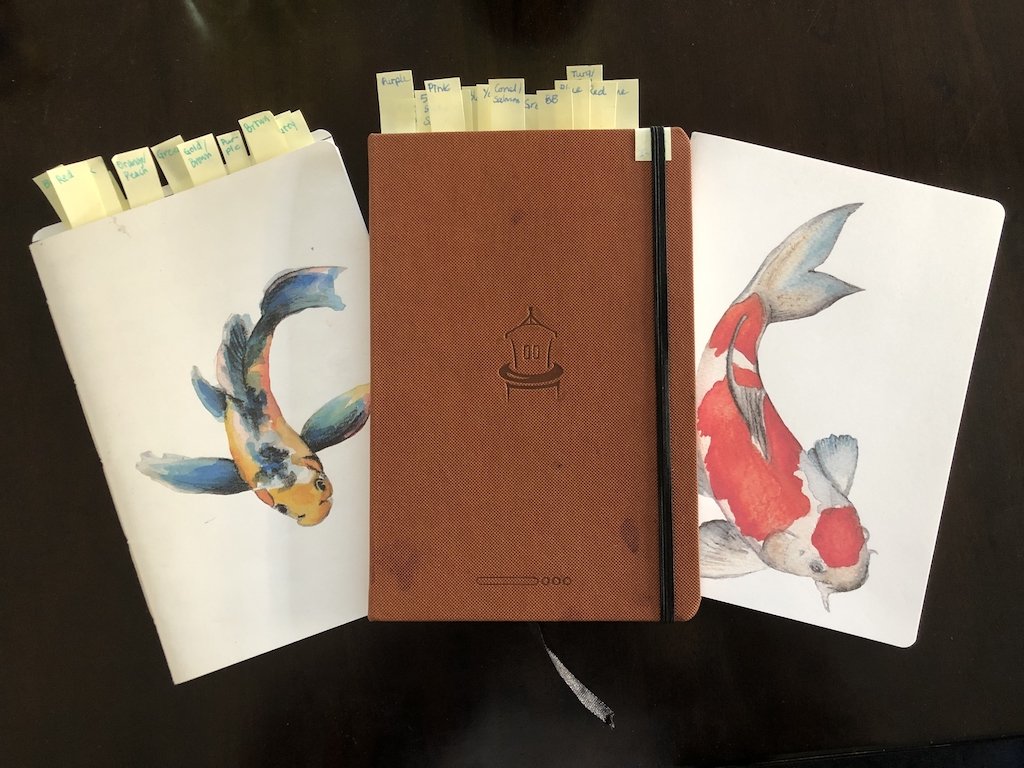
L to R: 52 gsm Tomoe River notebook, Endless Recorder with 68 gsm TR, 75 gsm Cosmo Air Light notebook.
I like to use a glass dip pen but you can use a regular calligraphy dip nib or dip a fountain pen, but I find that the latter results in more cleaning because the ink gets into the feed, and you may dilute the next writing sample because there’s water in the feed from cleaning. I like the glass dip pens with caps that you can get on eBay, because I can put them in my accessories pouch without worrying about breaking the tip. You can also use fountain pen dip pen holders like the Serendipity from Pensive Pens (prices in AUD and there are several models) which has a friction-fit nib/feed or from Red Dragon Pen Co which allows you to screw in a Jowo 6 nib unit.

Serendipity (left) and Red Dragon Pen Co (right) dip pens.
I dip my glass dip pen into the ink and always drag it against the lip of the vial/bottle to remove excess ink. The resulting writing sample is pretty close to what I would get from a western medium nib, which is my sweet spot. If you prefer finer or broader lines, consider a dip nib with a finer point, or even an italic nib. Just know that they have to be thoroughly cleaned and dried when you’re done so they don’t rust, and even then, they have a shorter life span than glass dip nibs (unless you break the tip).
I write the brand/name of the ink as well as figure 8s and Xs which sort of simulates cursive and print. The brand swatch is a small rectangle and the color swatch takes up the lower half of the card. I use the “wrong” end of a paintbrush to swab the ink. I’ve also used plastic dip pen holders, chopsticks (only plastic ones) and I know folks who use straight letter openers, palette knives and basically any long, thin, non-porous implement that’s easy to clean. I don’t use cotton swabs because they soak up a lot of ink, they don’t release said ink as thoroughly, especially the shimmer particles and sheen, and I don’t like the waste. I also don’t use paintbrushes because I’m usually swatching multiple inks in a session and it takes a long time to clean the brushes and there is always some water left in the brush so I don’t want to dilute the next swatch. Again, what I use/don’t use is personal preference, so use whatever tools that work for you.

Using the back side of a paintbrush to get the ink onto the cards.

Swatch cards done - digging the shimmer in this beautiful purple ink!!
If I’m swatching samples, I also slap a circular label on the top and swab the vial cap too. And depending on the bottle, I may also put a label on the bottle cap if they aren’t easily identifiable from the top (Diamine and Birmingham bottles are the two that come to mind). Putting the tables on vials/bottles also makes it easy for me to tell if I’ve swatched them without checking on FPC.

These labels make it easy to find ink samples later.

I can see what’s been swatched AND have an easier time finding the bottle I want.
Once the Col-O-Ring cards are done, it’s on to the notebooks. I use the ruling pen to do a wide line in the Endless Recorder and use the glass dip pen for the other two inserts. The notebooks are roughly sorted in ROYGBIV order but since I never seem to have enough pages between colors, so it’s a bit all over the place right now. I don’t try to group colors too closely, so there might be a light lavender ink just before a dark purple on the same page. Since I don’t really use these notebooks for quick reference, like I do with the Col-O-Rings, it’s less important to me that similar shades are next to each other. I’ve also done some other groupings like all Iroshizuku, since there aren’t that many colors, or the 2019 Diamine Inkvent colors.

Ruling pens make it easy to do wide swatches of ink. You can control the width via the knob on the side.

Sometimes you will see a big difference in how inks can look on different papers, sometimes they’re almost the same. And sometimes little subtleties show themselves more on some papers, like chromashading/multi-shading inks on Tomoe River, for example.
If you’re doing more than a few inks, it’s handy to be able to clean your dip pen at your desk instead of getting up to clean them at the sink (I did mention that I’m lazy, right?). This is where the syringe and two cups come in handy. I use plastic cups because they clean easily, are light, don’t absorb the ink and so I don’t stain our drinking cups, lol. I put these cups and syringe (with the tip safely tucked into the barrel) into my accessories bag when I go to pen meetups and have time to swatch inks.

I love being able to clean my tools without leaving my desk/table.
Before I jump into this year’s Diamine Inkvent calendar, if you missed out on the calendar (though it’s still available out there!) or just felt like you already have too many samples you haven’t swatched, consider making your own Inkvent calendar! I’ve repurposed (ok, stolen) my son’s opened LEGO advent calendars and put random, unswatched samples and voila, Inkvent calendar! You can also just put 25 samples in a baggie, close your eyes, and grab one - easy peasy!
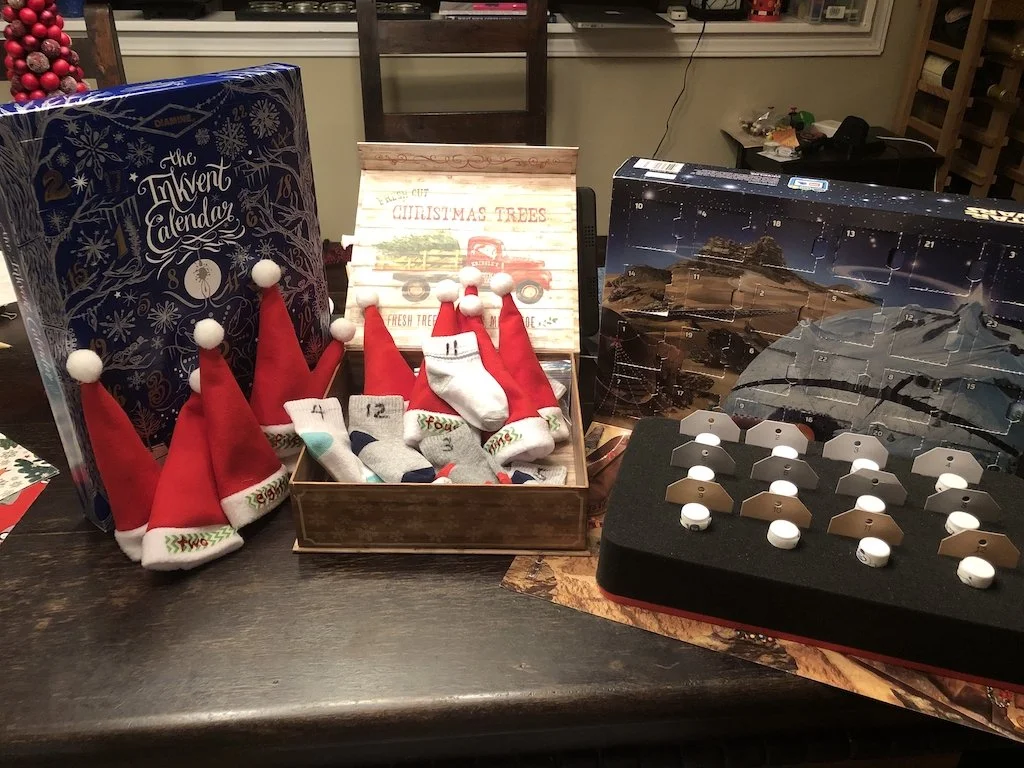
My friends and I did an inkvent swap in 2019 and I reused the 2018 LEGO Star Wars Advent Calendar box for my own samples.
Spoiler Alert: Alright, Diamine Inkvent calendar time, swatches ahead!
Diamine released their first Inkvent calendar for 2019. The calendar included 24 - 7ml samples of inks and a 30 ml bottle for day 25, all housed behind closed doors in a beautifully decorated blue box. There were a wide variety of inks including saturated, shading, shimmer and sheening inks. They eventually released all 25 inks in adorable glass bottles, dubbed the Blue Edition (this was one of my favorite Inkvent 2019 ink. Due to the pandemic, they did not release an Inkvent calendar for 2020, but they came back this year with the Red Edition for 2021. This year, the bottles are now plastic 12 ml square-ish bottles and the day 25 ink is still 30 ml. Retail price for the Inkvent Calendar is $110 in the US, though prices are often lower from the EU.

Time to take Diamine 2021 Inkvent Calendar, Red Edition, off the bookshelf and get swatching!


What’s lurking behind door number one?
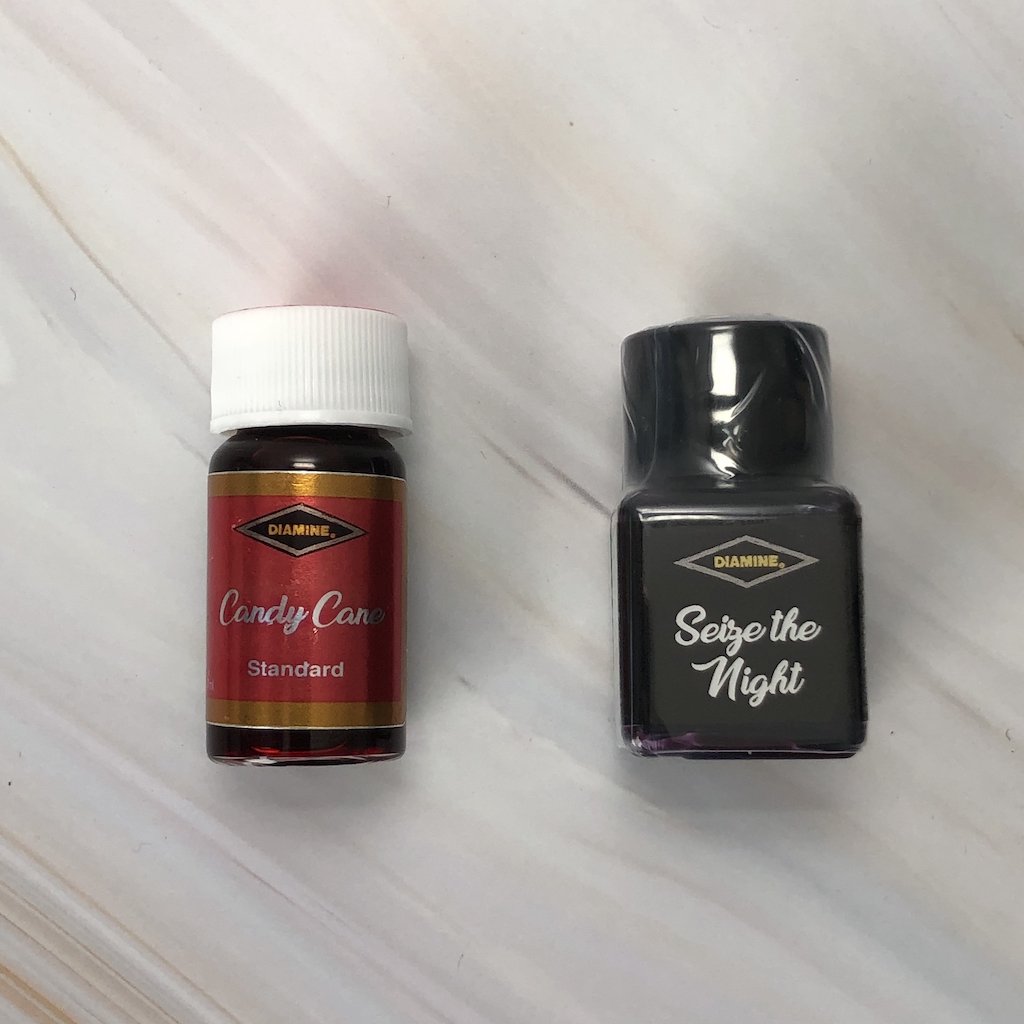
2019 and 2021 Inkvent bottles (glass, 7ml and plastic 12 ml, respectively.)
The ink goes down like a dark purple, much like the Esterbrook Lilac Shimmer that I just swatched but then it dries to a more muted color. On the Col-O-Ring, it almost looks brown, but there’s some purple tone to it. There is also some gold sheen in the swatch but it wasn’t really visible in the writing sample. On both the Tomoe River and CAL papers, it is a very dark purple and you don’t really see the brown nor the muted tone. You do get a bit of the sheen in the thick line of ink on 68 gsm (and I suspect you’d see a bit more sheen on 52 gsm if I did a similar swatch). The closest ink swatch card I have to this is Robert Oster Smokescreen, which is a brown ink that has a touch of purple. Hard to gauge flow from such a limited writing sample and swatching but it felt average for wetness/flow.

Doesn’t look like a purple when it’s dry.

You can see some sheen but it’s not over-the-top.

Very similar to Robert Oster Smokescreen which is a bit more brown than purple.


Top to bottom: Tomoe River 52 gsm, TR 68 gsm and CAL 75 gsm.
You can see more of the purple in the notebook papers but even then, this ink doesn’t scream purple to me. It seems fine but doesn’t wow me. But since I don’t have many other inks like this one, I’ll put it in a pen at some point down the road. That’s it for now. I’m still eager to see what the remaining 24 inks look like and look forward to seeing your Inkvent swatches, whether they’re from the Diamine calendar or your own swaps or stashes! Stay inky!