(Susan M. Pigott is a fountain pen collector, pen and paperholic, photographer, and professor. You can find more from Susan on her blog Scribalishess.)
During the pandemic, I've become a paper-crazed woman. Not only have I been making my own paper (see my paper-making posts here and here), but I've also been experimenting with other paper-related crafts.
I am fascinated with Washi Paper (see my review of the Yamamoto Paper Tasting Washi here), and as part of a paper arts conference I attended online in March, I watched a video on using Konnyaku starch to make Momigami paper.
Konnyaku (pronounced "koh-nee-yah-koo"), also known as Devil's Tongue Root, Snake Palm, and Voodoo Lily, is derived from the Amorphophallus Konjac plant. Using Konnyaku powder and distilled water, you can make a jelly-like starch to coat paper. After application, you roll up the paper into balls to wrinkle it, resulting in Momigami or "kneaded paper." The Konnyaku starch not only strengthens the paper, but the more you work it, mashing it up and rubbing it against itself, the softer and more cloth-like it becomes. You can then use it for book cloth, collage, paper weaving, and even clothing.
I ordered a kit from Washi Arts that included .5 grams of Konnyaku powder, a recipe, and a variety of different papers to experiment with.
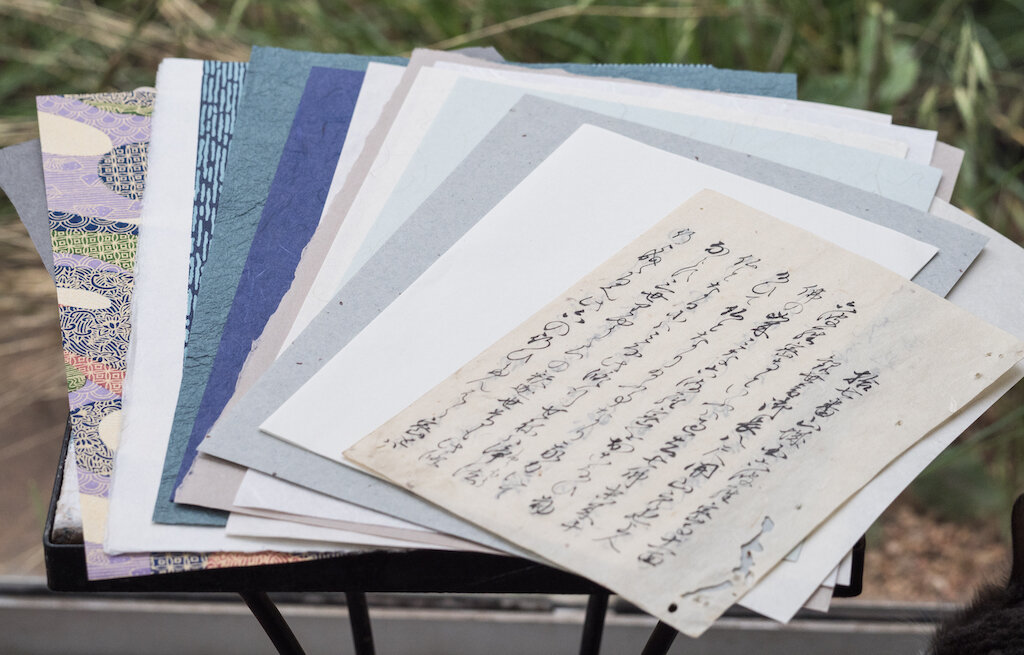
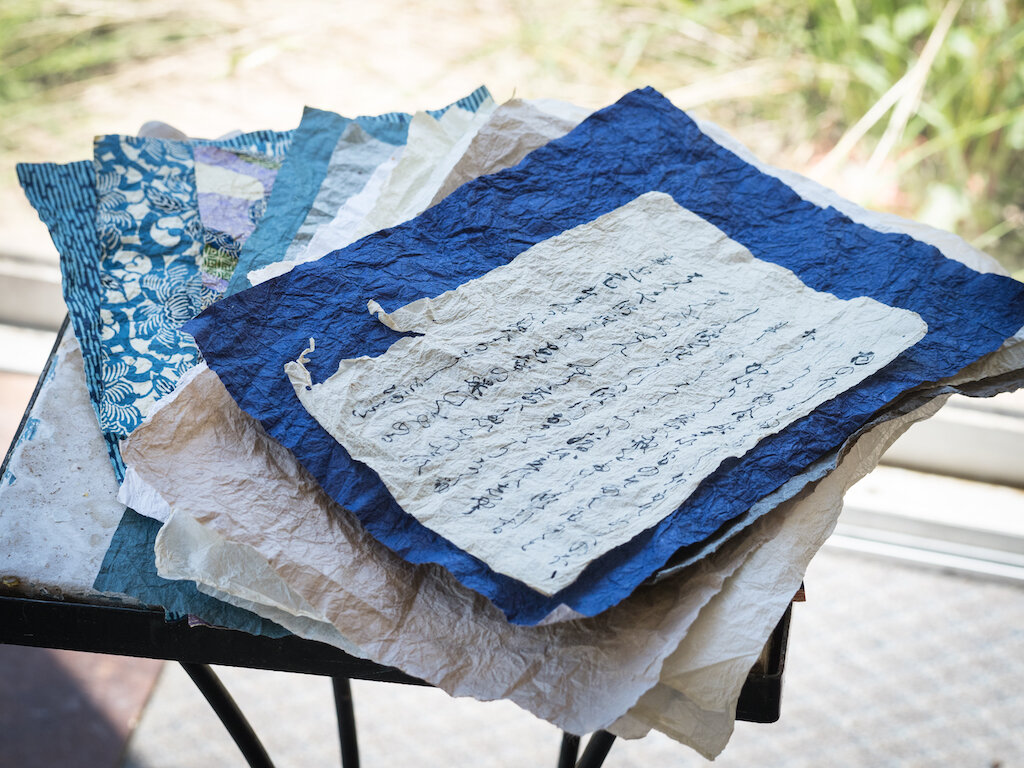
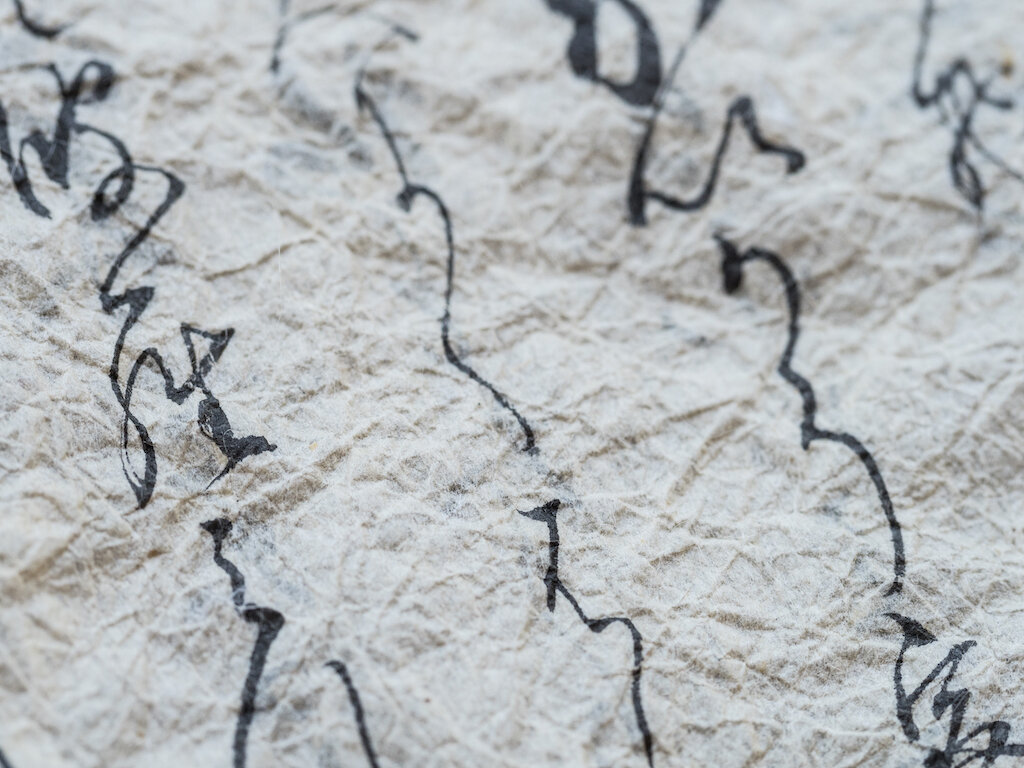
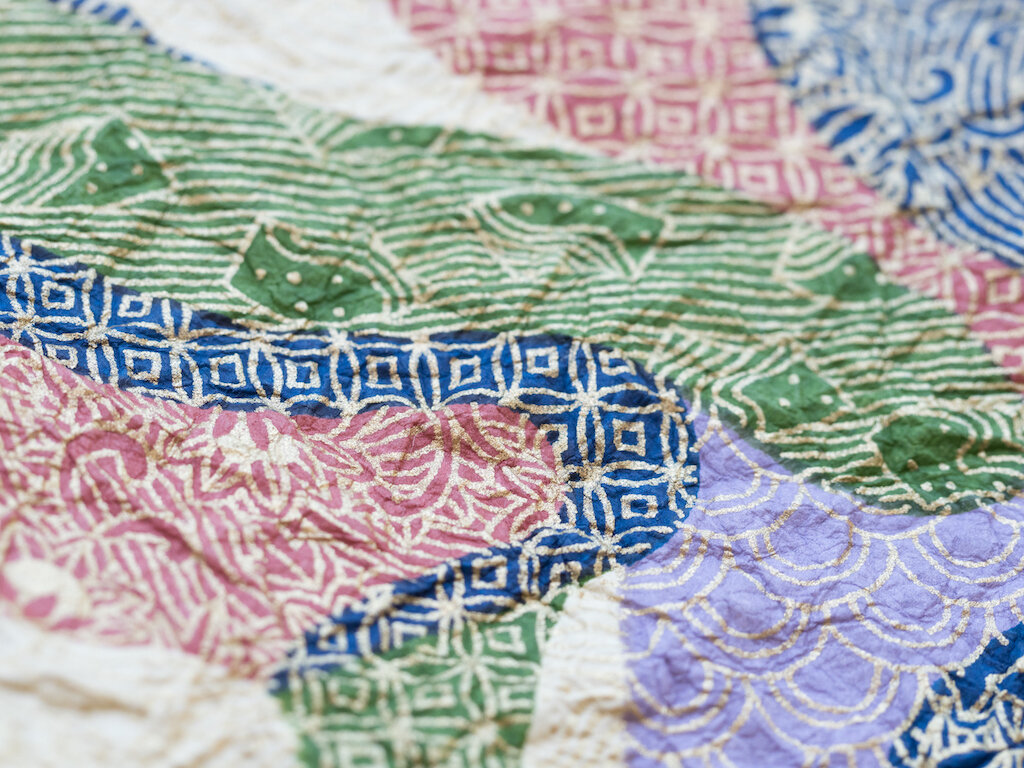
The Paper Before Treatment
After mixing the Konnyaku powder with distilled water, I stirred it with a whisk every few minutes for twenty minutes. Then I let the mixture sit for several hours, stirring it occasionally. The result was a goopy, almost clear mixture with the consistency of thick syrup.


I coated each piece of paper front and back with the Konnyaku mixture using a soft paintbrush.


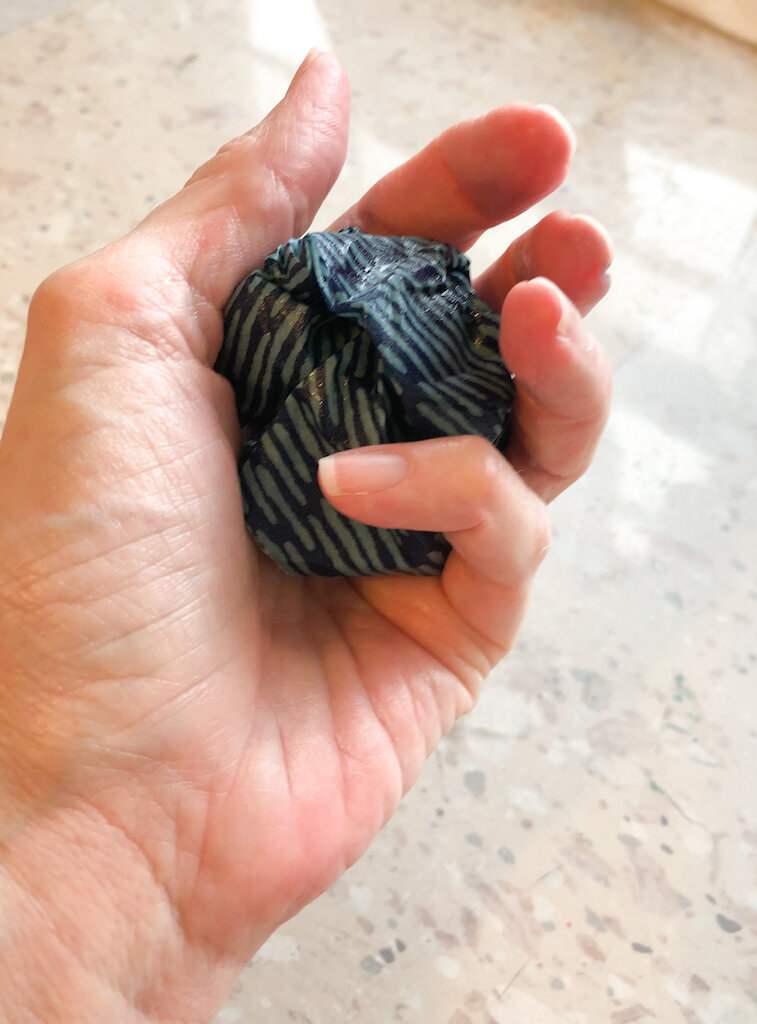
After that, I pulled the corners of the paper into the center and formed a loose ball.


Once all the papers were coated, I began kneading, rolling up each loose ball into a tighter one, then pulling it gently apart and repeating the process.
Then I used clothespins to hang the papers to dry overnight.

The next day, the papers were hardened from the starch.

I rolled the dry paper into balls to continue the kneading process.

I applied a second coat of Konnyaku to all the papers, front and back, and hung them to dry for another night.

I sat on the living room couch the next day with my stack of papers. Taking each one, I rolled and re-rolled it and rubbed the paper against itself. I probably spent two hours working the papers until they were extra soft and pliable. The result was a finished stack of cloth-like, highly textured paper.

Although I read that Konnyaku is supposed to make the paper waterproof, or at least water-resistant, my paper wasn't. Perhaps I needed to apply more coats of Konnyaku to make it waterproof.

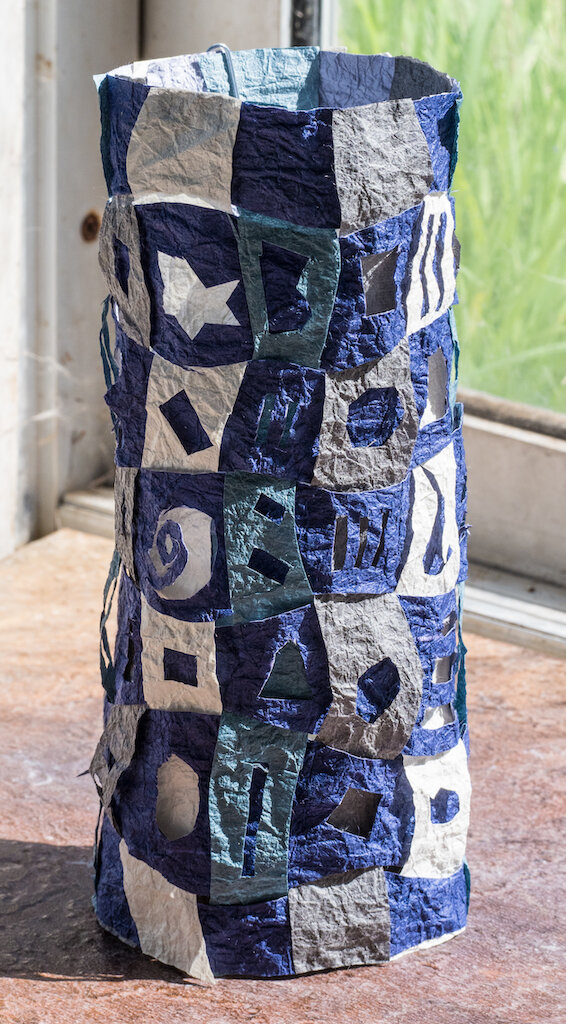
Regardless, I was happy with how each of the papers felt and looked. I decided to use some of the paper for a paper weaving. My base paper was royal blue and I used grey, off white, and teal strips for the weaving. Because the paper was pliable, weaving was easy, and the paper melded together nicely. The weaving looks good flat, but it also makes a pretty cool paper lantern.

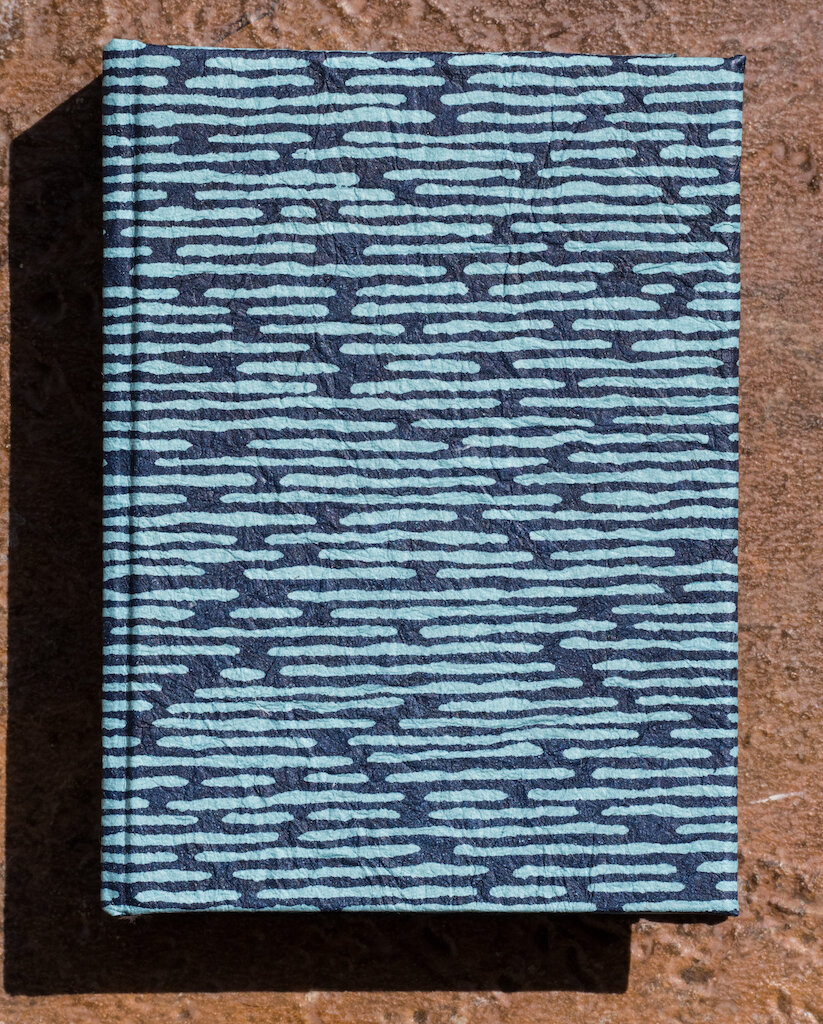
I used other Momigami paper as book cloth and endpapers for a small handmade book. The paper worked great as book cloth--the glue did not soak through--and the wrinkled texture makes the cover even more interesting. I love the textured look of the endpapers as well.


I realize this process may seem like a lot of work, but it's really quite relaxing. I thoroughly enjoyed painting the Konnyaku on the papers and wadding them up into wet balls, squishing them between my hands, and feeling the texture forming. It was even more fun to sit on the couch and crunch and rub the papers until they became soft and cloth-like. Paper kneading is a great stress reliever!
If you're interested in playing with paper, you can get the Washi Arts Momigami Paper Making Kit with either cool or warm colored papers for $35.00. There's also a mini kit for $15.00. Or, you can buy just the Konnyaku Powder (25 grams is $9.75 and 50 grams is $18.25) and use your own paper.
(I purchased the Washi Arts Momigami Paper Making Kit with my own funds.)
Enjoy reading The Pen Addict? Then consider becoming a member to receive additional weekly content, giveaways, and discounts in The Pen Addict shop. Plus, you support me and the site directly, for which I am very grateful.
Membership starts at just $5/month, with a discounted annual option available. To find out more about membership click here and join us!